Hello everyone, this is DIY Renova.
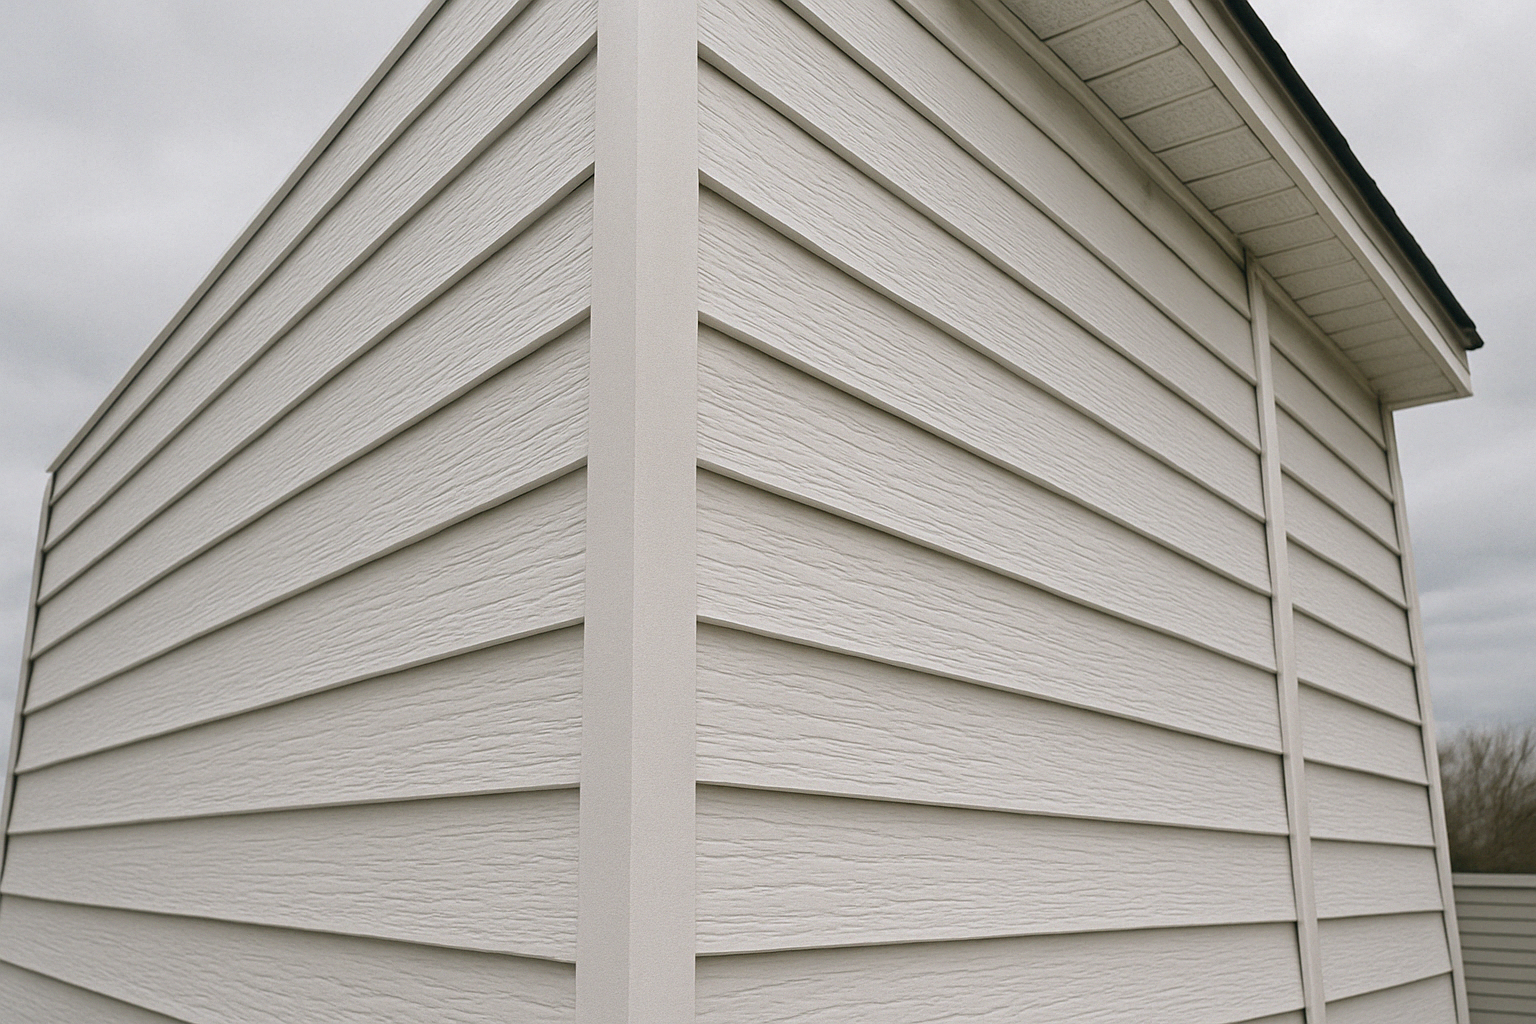
Zeon Siding (Royal Horizontal) is made of PVC resin and is very light, weighing approximately 2 to 3 kg per square meter (approximately 1/5 to 1/3 the weight of ceramic siding) (Zeon Siding official website, 2023).Zeon Kasei Co., Ltd. official website
Therefore, it is an exterior wall material that does not put much strain on existing wooden houses, and is compatible with layered renovations and self-renovation.
On the other hand, PVC expands and contracts depending on the temperature. The coefficient of linear expansion of PVC pipe is approximately 7 x 10⁻⁵/°C, and it is said that it expands and contracts by approximately 0.7 mm per meter per 10°C temperature difference (Kubota Chemix Technical Data, 2017).kubotake mix
In other words, if the siding is 3.6m long, it will move approximately 10mm when the temperature difference between summer and winter is 40℃.
If this "expansion and contraction" is not properly taken into consideration during construction, it will lead to warping, waving, and cracking.
In this article,
- Japanese wooden two-story house
- Zeon Siding "Royal Horizontal"
- People who build their own scaffolding and perform self-construction
With this in mind, I will write about it in a very specific way, with the goal of ``just looking at this page and being able to start the actual construction.''
I am planning to write a separate article on how to prepare the base for resin siding, so I will not cover it this time.
If you're wondering "How much renovation or remodeling can I actually do on my own home?" or "Where should I even start?", please visit this page. If you're looking to learn more about specific renovation processes or construction details, don't miss this page as well!
Information on updates to this website will be delivered to you once a month.NewsletterIf you are interested, please register.
Please note that this document is not necessarily accurate, and should be used as reference information only.
Zeon siding isConstruction videoWe also have them available, so please check them out first!
So, here you go.
Equipment and equipment to consider
First, let's talk about the construction environment and the minimum equipment that should be provided.
Scaffolding/safety equipment
- Frame scaffolding or monotube scaffolding
- Scaffolding is almost essential when replacing the entire 2-story building.
- When working at heights, the use of scaffolding and safety belts is required in accordance with relevant laws and regulations (Zeon Siding Construction Manual, 2025).Zeon Kasei Co., Ltd. official website
- Safety belt (full harness type is preferable)
- Helmet, non-slip shoes, work gloves
- Scattering prevention net (neighborhood consideration)
Power supply/tool storage
- Outdoor extension cord (grounded)
- Charging station for impact drivers/drill drivers
- Workbench for cutting siding (veneer + 2 horses is also OK)
Waste materials/industrial waste related
Zeon Siding itself, including scraps after construction, is treated as industrial waste and must be disposed of in accordance with local government rules (Zeon Siding Construction Manual, 2025).Zeon Kasei Co., Ltd. official website
Additionally, if there is a possibility that the existing exterior walls contain asbestos, a preliminary investigation is required. Similarly, the manual clearly states that a "preliminary investigation to determine the presence of asbestos" is required.Zeon Kasei Co., Ltd. official website
This is the point where you should always consult a professional or specialized organization before proceeding even with self-renovation.
Types of construction methods and how to choose them
There are roughly three typical construction methods for Zeon Siding (Royal Siding).
- "Layered (directly laid) construction method on top of the existing exterior wall"
- "Layered construction method with ventilation layer using trunk rim"
- "New construction or ventilation method that involves starting over from the groundwork"
In this article, we will introduce realistic methods for self-renovation.
While explaining "1" and "2" in detail, I will also give an overview of "3" at the end.
1) Layering on top of the existing external wall (direct mounting)
- The existing exterior walls (mortar, ceramic siding, etc.) are relatively straight,
This method is easy to choose if it can be used as a base. - Add a breathable tarpaulin sheet and screw the royal horizontal panel directly onto it.
- It is simple to construct and requires less materials, so it is suitable when you want to save cost and labor.
However, the ventilation inside the wall is inferior to the rim construction method, so
If you want to ensure proper ventilation in conjunction with insulation renovation, the following method is advantageous.
2) Layered upholstery with ventilation layer using the torso
- This is a construction method in which a moisture-permeable waterproof sheet is placed over the existing exterior wall, a wooden rim of about 18 to 30 mm thick is placed on top of the sheet, and Zeon siding is fastened to the rim.
- The advantage is that a ``breathing layer'' is created between the exterior wall and the existing foundation, making it easier for moisture and rainwater to escape from within the wall.Asset Four |.
The general guideline for the thickness of the ventilation rim is ``18 mm or more'' (Housing Contractor Blog, 2025), which ensures the necessary ventilation cross section.Asset Four |
If possible, we recommend this construction method if you live in a cold or humid region, or if you plan on living in a house for a long time.
3) Case of new construction/reassembly from the groundwork
- Structural plywood + breathable waterproof sheet + rim + Zeon siding
This is a typical configuration of the "External Wall Ventilation Construction Method" (Standard Construction Guidelines for Ceramic Siding, 2021).Japan Ceramic Exterior Materials Association - In fire prevention areas and semi-fire prevention areas, the configuration must be determined in accordance with the specifications of the fire prevention certification obtained by Zeon Siding.Zeon Kasei Co., Ltd. official website.
This is an area to be decided together with the designer, so this article will limit itself to an "overview".
We will focus on "layered renovations" which are common in self-renovation.
Material Checklist (Royal Horizontal Edition)
Here, we will organize the necessary materials based on the assumption that Royal Horizontal Paneling will be overlaid on an existing wall.
Main body/Accessories
- Royal horizontal body (product number RCD4T, etc.)Kimura Co., Ltd.
- Starter (lowest receiving material)
- Extruded corner lumber/entered corner lumber
- J channel (around the opening/parting)
- Trim (soffit, under sash, parting, etc.)
- Draining hardware (above the foundation/below the opening)
- Windlock fittings (for strong wind areas) if necessaryZeon Kasei Co., Ltd. official website
Base material/waterproof material
- Moisture-permeable waterproof sheet (JIS standard product for general detached houses) ← Buy one for resin siding! !
- Waterproof tape (around sash/overlap of sheets)
- Rim (for ventilation method)
- An example of recommended size: cedar or cypress wood approximately 18 to 30 mm thick x 45 mm wide
- Repair materials for existing exterior walls (crack repair mortar, etc.)
Screws/fixing hardware
- Siding screws (stainless steel or hot-dip galvanized)
- For example: It is recommended that the diameter be around 4.0mm, the length be 40-50mm, and the length should penetrate at least 32mm into the base (North American Vinyl Siding Specifications, 2021).Polymeric Exteriors.
- Wooden screws or nails for fixing the rim
- Hardware for anchor bolts if necessary
Consumables/Others
- Sealing materials (recommended products for moisture-permeable waterproof sheets, such as modified silicone)
- Primer (sealing pretreatment)
- Protective Tape/Blue Sheet
- Masking tape (for waterproofing around the sash)
- Siding screws (stainless steel/exterior)
- Breathable waterproof sheet
- Sealing material
- Zip tool for siding
tools checklist
Essential Level
- Impact driver (for screwing)
- Rechargeable drill (for making long holes yourself)
- Level (preferably a laser marker)
- major scale
- Insert (perpendicularity confirmation)
- cutter/scissors
- Metal scissors (for cutting trim and accessories)
- Zip tool for siding (removal tool)
- Stepladders and scaffolding boards
- Safety belt, helmet, gloves
A special tool that will make your life overwhelmingly easier.
- Notch punch (snap lock punch)
→ A tool to easily make "claws" for fitting into trim. - Nail hole punch (long hole punch)
→ A tool to drill a new long hole in the cut end of the main body.
I think it's best to use genuine Zeon products, but if they meet the specifications, third-party products for vinyl siding can also be used instead.
Overall picture of construction sequence
Now on to the main topic, the construction procedure.
We will explain each step using the layered construction method with a vented rim as an example.
- Confirmation of existing external walls and structure
- Removal of obstacles and incidentals
- Repair and preparation of existing external walls
- Waterproof sheet/waterproof tape construction
- Attaching the fuselage (ensuring a ventilation layer)
- Installation of accessories such as external corners and internal corners
- Installing the starter and leveling
- Installing the J channel trim
- Construction of main body panel (1st stage to top stage)
- Fitting construction around the eaves and under windows
- Sealing/Final check
We'll take a closer look at each step below.
Construction method Step 1: Confirmation of existing external walls and structure
1-1 Check the type and condition of existing external walls
- mortar lath base
- Ceramic siding
- Galvanized galvanized steel plate
Whether or not it can be used as a base will change depending on the type of existing exterior wall.
There are four points you should check:
- Is there any large lifting, peeling, or wobbling?
- Are there any signs of rain leaks? (Check inside the room as well)
- Are cracks or chips reaching the structure?
- Is there any structural inclination or subsidence (roughly check with a laser)?
If you have any structural concerns, it is safer to consult a carpenter or designer first.
Since Zeon Siding is only an "exterior finishing material", structural issues must be solved on a separate layer (Zeon Siding Catalog, 2024).Kimura Co., Ltd.
1-2 Base support conditions
The standard practice for vinyl siding is to fasten screws to the underlying pillars/studs (or edges) at a maximum pitch of about 400 mm (North American Vinyl Siding Installation Manual, 2013).Gentek Canada.
Even when layering on an existing exterior wall,
- Estimating the position of columns and studs from drawings and nail positions
- If possible, check the actual location with a base finder
By doing so, you can prevent the problem of screws becoming loose.
Construction method Step 2: Removal of obstacles and incidental materials
Even in the Zeon Siding Construction Manual,
This process is so important that the items ``removal of obstacles'' and ``incidental construction'' are separate items.Zeon Kasei Co., Ltd. official website.
2-1 Items to be removed
- Existing rain gutter fittings (if repositioning)
- Existing drainage/parting/decoration molding
- air conditioner piping cover
- Exterior accessories such as external lighting, intercoms, and posts
Be sure to record what was attached where with photos.
You won't have to worry about it when restoring later.
2-2 Handling of sheet metal
When removing existing metal siding or galvanized iron,
- Starting from the top, remove the nails and screws from the joint.
- Slide and remove one by one
- If there is a risk of rain leaking from the fractured surface or nail hole, temporarily repair it with mortar etc.
You can leave the water drainer on the foundation if it can be used as is, but
In many cases, it is easier to prioritize the fit of the new starter by removing it and then installing a new one.
Construction method step 3: Base repair/waterproof sheet
3-1 Repair of cracks and chips
- Part where the mortar is cracked
→ Backfill with mortar repair material - Chips in ceramic siding
→ Smooth with putty or mortar
Although some unevenness can be absorbed using the ventilation rim construction method,
If there is a difference of 5 mm or more, the edges will bend and the final siding will be prone to waving.
It is safe to use a 1.8m long ruler and aim for a gap of 3mm or less.
3-2 Construction of moisture-permeable waterproof sheet
- Stretch horizontally starting from the bottom.
- The upper sheet overlaps the lower sheet by at least 100mm.
- Corners should be rolled in by 300mm or more
- After stapling, treat overlaps and penetrations with waterproof tape.
This area is similar to the standard for general exterior wall waterproofing,
Similar dimensions are recommended in the Ceramic Siding Standard Construction Procedures.Japan Ceramic Exterior Materials Association
The area around the sash is especially important,
- Apply waterproof tape in the order of bottom frame → sides → top frame.
- Fold the end of the tape back with scissors to create a "turn" for the water.
Construction will be done with rain protection in mind.
Construction method step 4: Attaching the rim (for ventilation method)
4-1 Arrangement of body rim
In the case of horizontal installation, the torso is basically installed in the ``vertical direction''.
- Vertical trim at a pitch of 455mm or 303mm depending on the position of posts and studs.
- Around the window, there is a reinforced rim that wraps around the opening.
- If you put one each directly under the eaves and near the top of the foundation, it will fit neatly.
As for the ventilation layer, if the thickness is 18mm or more, the ventilation resistance will be low.
Moisture and rainwater inside the wall can be effectively drained (Blog explaining external wall ventilation construction method, 2025).Asset Four |
4-2 Fixing the body rim
- The rim is fixed to the structural material (posts/studs) with 45-60mm wood screws.
- Vertical seams must always be made on top of the base.
- The lower end of the rim is fixed slightly above (10 to 20 mm) above the draining hardware on the foundation.
→ Outside air enters from here and rises through the ventilation layer.
Construction method step 5: Attaching accessories
Even in the Zeon Siding Construction Manual,
It is explained in the order of "outside corner/inside corner → starter → J channel → trim → main body."Zeon Kasei Co., Ltd. official website
5-1 External corner/inside corner
- Position it vertically along the torso using a laser or plumb bob
- Drive a screw into the long hole in the center 10 to 15 mm away from the end.
- The vertical screw pitch is approximately 400mm (in areas with strong winds, reduce to approximately 200mm)Gentek Canada.
- Leave enough slack for the screw head to fit a piece of paper between the head and the long hole.
→ This is the clearance for "expansion escape".
5-2 Starter
- Determine the "parting line" of the bottom layer of siding you want to complete based on the height of the foundation top.
- Draw a reference line with a laser or spirit level, and screw the starter along that line.
- Leave a gap of about 10 mm between the starter joints to allow for expansion and contraction (Overseas Vinyl Siding Installation Guide, 2015).THD Static Images.
5-3 J channel trim
- Around the sash: Surround with J channel, cut 45 degrees at the four corners or use special caps
- Directly below the eave ceiling: Install the eave trim horizontally
- Below the window: drain rainwater to the outside with a special trim or drainer + J channel
At this stage, the "framework" of the exterior wall is completed.
Construction method Step 6: Construction of main body panel
It's finally time to install the Royal horizontal tension body.
6-1 1st row
- Fit the bottom edge of the main body panel into the hook of the starter
- Align the upper elongated hole with the body edge position and drive the screw in the center.
- As a guideline, the screw pitch should be approximately 400mm, with a distance of at least 100mm from the end (North American Guide).Gentek Canada.
- Raise the screw head slightly to prevent it from coming into close contact with the siding.
→ The only correct answer is that “When you slide the siding from side to side, it will rattle” (Georgia-Pacific Installation Guide, 2021).THD Static Images
6-2 Second stage and beyond
- Snap the bottom edge of the upper tier into the lower tier.
- After locking the panel firmly from end to end, drive a screw into the long hole at the top.
- Leave a gap of at least 10 mm at the joints (horizontal joints between the main bodies),
The trick is to adjust the length a little shorter on hot days and a little longer on cold days (Vinyl Siding Installation Guide, 2015).THD Static Images.
6-3 Parts that need to be cut down
When cutting the main body short, such as above and below windows or near the eaves,
- The long hole at the top end often does not remain.
→ Create a new long hole with a nail hole punch
→ If you don't have one, use a drill to drill 2 to 3 holes with a diameter of 3 to 4 mm, and use a file to connect them to create a "slot".
In addition, at the upper end that inserts into the soffit trim,
- Make several "claws" with a notch punch and hang them on the trim.
- As an alternative, you can cut it in a U-shape with scissors and then bend it with pliers (the strength will be slightly lower).
These specialized tools can be used for all similar types of siding, such as Royal Horizontal and New Color Scaping, even if you are doing DIY.
As a blog,
- "Amazon link for nail hole punch (long hole punch)"
- "Yahoo Shopping Link for Notch Punch"
If you introduce this, it will be easier for the reader to add it to the cart.
Construction method Step 7: Around windows and eaves
7-1 Storage under the window
- Install lower window trim or drainer + J channel
- Cut the main body to the required size and punch a new long hole at the top.
- Insert the bottom edge into the trim and secure the top edge with screws
Rainwater tends to concentrate under windows, so
- Fold both ends of the trim outward slightly to create a "water return"
- Make sure to store the water from the gap between the main unit and the trim to the outside.
Small measures like this will help extend the lifespan.
7-2 Top tier directly below the eaves
The top tier is
- height is halved
- Needs tab processing to insert into trim
etc. The difficulty level will increase slightly.
- From the measured remaining height,
Calculate the "bottom edge + overhang + extra length for folding the claw (20-30mm)" - Make several claws on the extra length using a notch punch.
- Insert into the soffit trim from above and lock into the lower ledge.
If done well, it will fit neatly without any screws showing.
Checklist of things to consider
Before construction, it is a good idea to write down the following points on paper and check them.
- “Layering” or “Redoing from the groundwork”?
- Whether to use a ventilation rim (local climate, budget, insulation plan)
- Whether it is a fire prevention area or semi-fire prevention area (confirm with the government office or building official)Zeon Kasei Co., Ltd. official website
- Is there a possibility of asbestos in the existing exterior walls? → Arrange for investigation
- How to install scaffolding and consideration for the neighborhood (schedule/noise hours)
- Notes on reinstallation locations of rain gutters, piping, air conditioners, lighting, etc.
- Combination of siding color and accessory color (consider more as it is difficult to order additionally)
Construction checklist (from the day to completion)
Here is a rough summary of the checkpoints that you should check during and after the actual construction.
Under construction
- Is the starter level? (Check with a laser or long level)
- Is the screw driven in the "center" of the slotted hole (ensuring clearance for expansion/contraction)?THD Static Images.
- Is the screw head too tight? (Can the panel slide left and right?)
- Is there a gap of about 10mm between the main bodies?
- Are there ventilation openings at the top and bottom of the trunk (not blocked)?
- Is the waterproof tape around the sash broken or floating?
upon completion
- Is there any waving or extreme warping in the appearance?
- Are there any gaps in the outside corners, inside corners, and trim joints?
- Are there any areas that require sealing (top edges, above windows, etc.) that you have forgotten to seal?
- Has cleaning of scraps, vinyl pieces, screws, etc. been completed?
- Take construction photos to insure your warranty and prepare for future DIY projects.
Materials/tools checklist (summary)
Finally, so that you can prepare as you read this article,
Make a list of materials and tools.
material
- Zeon Siding Royal Horizontal Body
- starter
- Extruded corner lumber/entered corner lumber
- J channel
- Various trims (under windows, eaves, etc.)
- drainer hardware
- Windlock fittings (if you live in a strong wind area)
- Torso (thickness 18-30mm x width 45mm)
- Breathable waterproof sheet
- Waterproof tape
- Siding screws (stainless steel/exterior)
- Screws/nails for fixing the rim
- Sealant/Primer
- Curing tape, masking tape, blue sheet
Tools
- Impact driver
- Drill (for drilling)
- Level/laser marker
- Measure/insert
- cutter/scissors
- Zip tool for siding
- Notch punch (snap lock punch)
- Nail hole punch (long hole punch)
- Workbench/Stepladder/Scaffolding
- Safety belt, helmet, gloves, safety glasses
Finally: Just one more engineering point
- Zeon siding is a material that is ``light'' but ``expands and contracts well.''
→ Lightweight at 2 to 3 kg per 1㎡ (Official Zeon)Zeon Kasei Co., Ltd. official website
→ The linear expansion coefficient of PVC is approximately 7×10⁻⁵/℃, and it expands and contracts approximately 10mm at a 3.6m material with a temperature difference of 40℃ (Kubotake Mix, 2017).Kubotake mix. - That's why the rules of ``put the screw in the center of the slot,'' ``don't overtighten the screw head,'' and ``leave gaps between accessories and the joints of the main body'' are very important (Vinyl siding installation guide, 2015).Gentek Canada.THD Static Images.
- Using a ventilation rim makes it easier for moisture and rainwater to escape from within the wall, leading to increased long-term durability (Exterior Wall Ventilation Construction Method Commentary, 2025).Asset Four |.
As long as you keep these three things in mind, all you have to do is follow the steps in this article slowly.
Self-renovation should be enough to give you a professional-looking finish.
If you're wondering "How much renovation or remodeling can I actually do on my own home?" or "Where should I even start?", please visit this page. If you're looking to learn more about specific renovation processes or construction details, don't miss this page as well!
Information on updates to this website will be delivered to you once a month.NewsletterIf you are interested, please register.
Please note that this document is not necessarily accurate, and should be used as reference information only.
So, here you go.
References/videos
- Zeon Siding “Construction Manual” (2025 edition)Zeon Kasei Co., Ltd. official website
- Zeon Siding official website “Fire and heat resistance explanation page”Zeon Kasei Co., Ltd. official website
- Zeon Siding official website “Resin siding is thin and light, but is it okay?”Zeon Kasei Co., Ltd. official website
- Zeon Siding “Installation procedure introduction video”Zeon Kasei Co., Ltd. official website
- Standard construction guidelines for ceramic siding (Japan Ceramic Exterior Materials Association, 2021)Japan Ceramic Exterior Materials Association
- Kubota Chemix “Temperature change and expansion/contraction length of rigid PVC pipe” (2017)kubotake mix
- Various Vinyl Siding Installation Guide, 2013–2015 (Gentek, Georgia-Pacific, etc.)Gentek Canada
Leave a Reply
You must be logged in to post a comment.