Hello everyone, this is DIY Renova!
Self-renovation has been attracting attention recently.The joy of improving a part of your home with your own hands will not only save you money, but it also serves as a great opportunity to deepen your attachment to your home.In this article, we will focus on "removing and replacing post-installed balconies and balconies," and will explain as clearly as possible, including quantitative engineering reasons, so that even amateurs can take on challenges in Japanese wooden houses (estimating a maximum of two-story building).
Of course, safety is the most important thing, but after reading this article I aimed to be able to take action by saying, "Let's give it a try!"
This article is designed to be step-by-step and is in line with the housing situation in Japan.I will mention any overseas construction methods and products that are useful as much as possible, but the basic principle is to methods aimed at Japan.In the second half, we also organize a list of various construction methods and criteria for choosing them.Please take a look until the end.
So, here you go.
Why self-renovation do balconies and balconies?
Many people may think, "It would be difficult to work on a balcony through self-renovation..."However, due to the recent DIY boom and the spread of the Internet, correct information has become easier to access than before.And there are many benefits to working on your own:
- "Cost reduction": When you ask a contractor, you will incur large amounts of scaffolding and labor costs, but by doing your own work or repairs, you can significantly reduce costs.
- "Dependent of freedom": You can choose the design and finish of the balcony to your liking.
- "Attachment": By renovating it yourself, you will become more attached to your home.
- "Learning": It is a good opportunity to learn about the structure and waterproofing technology of wooden houses, and is useful for future maintenance and other renovations.
Of course, there is a risk if you fail.However, balconies and balconies are more of an external structural unit than a "structural structure itself," and although expertise is required, it can be said that the hurdles are lower than construction work that involves messing around with the entire housing foundation.
The entire process flow
The major steps we will be dealing with today are as follows:
- Current status survey (confirmation of structure and deterioration status)
- Demolition (removal of existing balconies and balconies)
- Repairs and reinforcement of the base and structure
- Selection and design of new veranda and balcony
- Installation method (multiple construction methods available)
- Waterproof and finish
- Safety check
We will explain the tools and points to keep in mind for each step, and organize them to make them easy to understand even for beginners in DIY.
STEP 1: Current status survey
1-1. Understanding the structure and deterioration situation
The first thing to do is to conduct is "Current Situation Survey."We will investigate how the retrofit balcony is fixed to the residential building and how much deterioration has progressed.
- "Confirm installation instructions": Check whether it is fixed directly to the wall, whether it is supported on the ground by erecting a pillar, or whether it is both.
- "Confirming the material": Identify the materials of existing balconies, such as wood, steel, and aluminum.
- "Whether corrosion, rust, or cracks": If it is made of wood, is it rot or insect-eating?If it is made of metal, check for rust and deterioration of the welded parts.
In the case of wooden houses, older buildings are likely to cause deterioration and water leakage.In particular, "improvement in waterproofing treatment near the wall" and "clogged drain" can easily lead to rain leaks and termite damage.
1-2. Considering an estimate of load capacity
Balconies and balconies not only attract people, but also place heavy objects such as planters, so a certain amount of load capacity is required.In Japanese homes, the design loads for balconies and balconies are often assumed to be 180-200 kg/m² (under the Building Standards Act, snow loads must be taken into consideration, and depending on the region and purpose of use, a higher load may be required).
Even if it's DIY, it is important to consider the load capacity from the following perspectives:
- "Assuming that several people will be on the train": The amount is 60-70kg per person, with a minimum of 2-3 people available.
- "Weight of items": Assume planters, clothesline stands, large storage cases, etc.
You should consider whether the current balcony meets this standard, and if necessary, reinforcement and replacement.
STEP 2: Demolition (removal work)
2-1. Safety first
Demolition will produce more dust and debris than you imagined.Furthermore, since the work is carried out at high altitudes, there is a high risk of falling accidents.Wear protective equipment such as helmets, safety shoes, gloves, and protective glasses, and work with at least two people as much as possible.Furthermore, we will lay down protective sheets and blue tarpaulins to ensure that the surrounding area is not damaged.
2-2. Disassembly procedure
- "Removing handrails and wall panels": First remove from exterior materials or handrails.Remove screws and bolts and separate them apart.
- "Removing flooring": Remove the deck parts (wood, FRP, etc.) one by one.If corrosion is ongoing, be careful of damage.
- "Removing the frame": Removed by loosening steel, aluminum frames, or wooden square timber.Carefully remove the part that is fixed to the wall and work to avoid damaging the home itself.
- "Removing pillars (posts)": If there are pillars that stand directly on the ground, they may be hardened with concrete, so an electric hammer or a shunt machine may be required.
2-3. Disposal of waste materials
After dismantling, the waste material will need to be separated when disposing it.Separate metals by metal and wood by wood, and dispose of them as industrial waste according to local government rules.If you bring your aluminum material to a recycler, they may buy it.
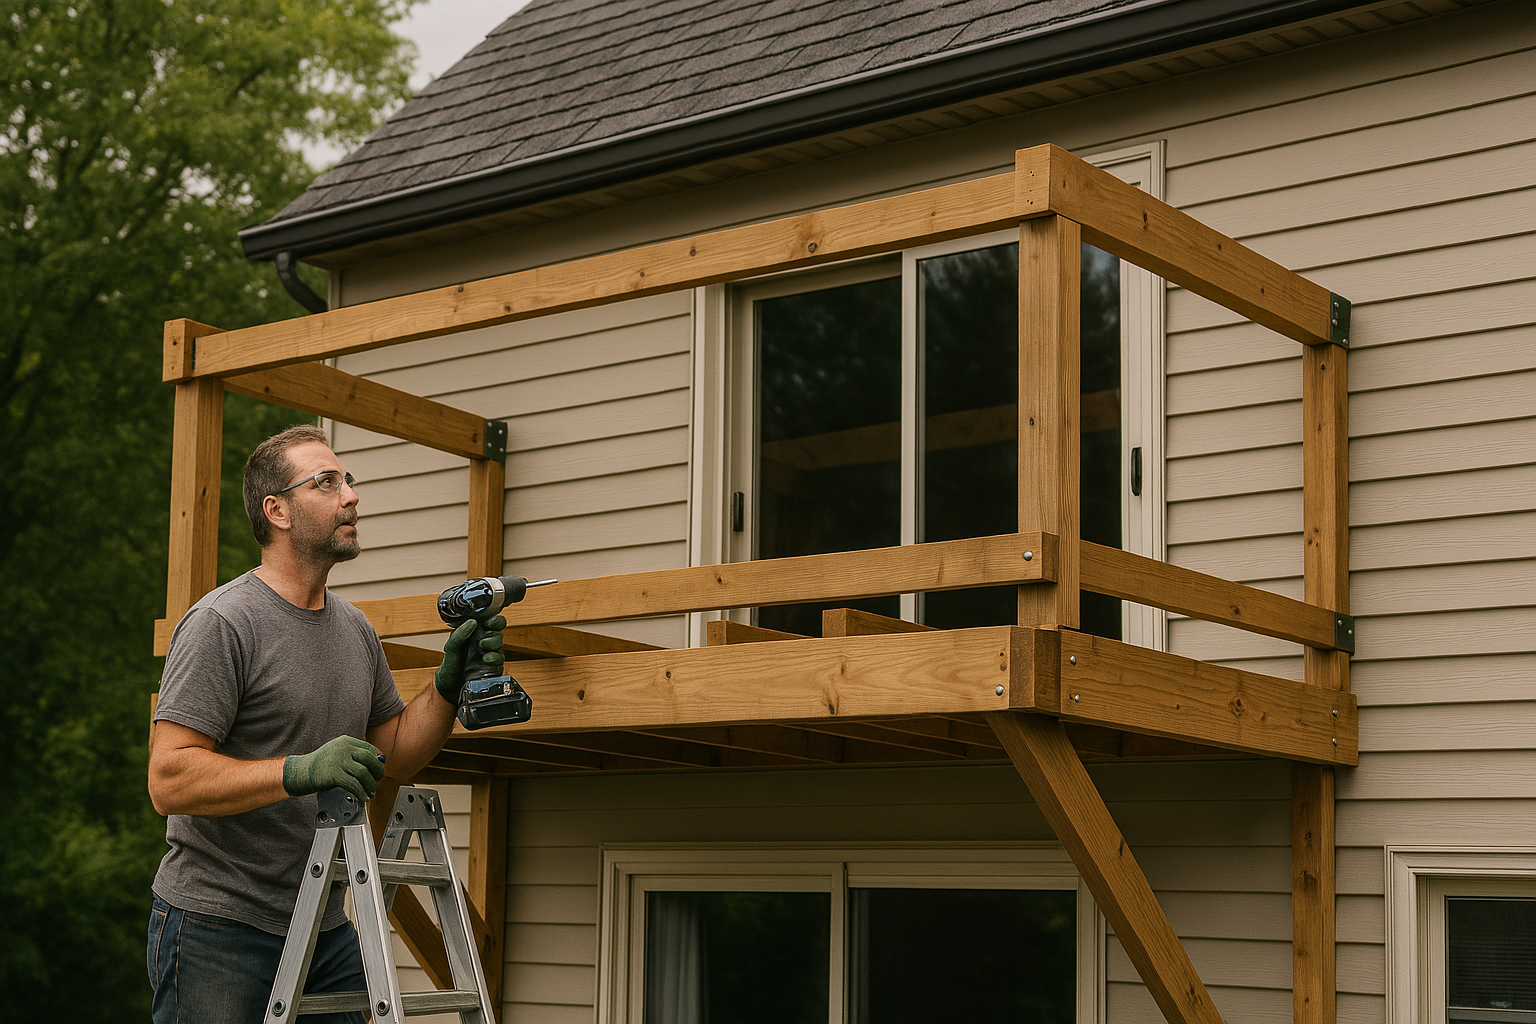
STEP 2-1: Scaffolding and work plan for the 2nd floor balcony
The demolition of the balcony installed on the second floor will have a major impact on the structure of the first floor and the surrounding environment, so safety must be taken as a top priority.Especially since work is done at high altitudes, incorrect decisions can lead to "falling accidents" or "damage to the home itself."
This chapter will explain the scaffolding concepts, work plans, and procedures required to demolish the second floor balcony, in a level that allows you to actually work.
Why do you need scaffolding?
The height from the ground to the floor of the balcony on the second floor is usually about 2.5 to 3.5m.This is a height that makes it difficult to "stable work" and "delivery of parts" using just a stepladder or simple platform.It is extremely dangerous if there is no scaffolding, especially when the following tasks are involved.
- Cutting and removing balcony flooring materials
- Demolition and removal of pillars and frames
- Hanging heavy parts
- Check and repair walls and eaves
In addition, if you accidentally drop tools such as crowbars and impact drivers during work, it can lead to personal injury or damage to your home, so it is extremely important to have a large work space.
Basic patterns for setting up scaffolds
Pattern 1: Single pipe scaffold (clamp type)
The most common and DIY-friendly scaffolding using single pipes is a type of scaffolding.It can be rented from a home improvement store or scaffolding company, and can be installed as much as necessary.
- A 48.6mm single pipe pipe is used for the support, and horizontal material is installed using orthogonal clamps.
- Secure mesh work floor (steel fabric)
- Handrails to prevent falling are placed on three levels (waist, chest and knees).
- Anchors also tighten to stabilize the wall side.
Installation requires some technical and safety knowledge, but it is the most cost-effective to rent it for a few days.
Pattern 2: Rolling Tower (Mobile Scaffolding)
For sites where installation space is limited, we also recommend the "Rolling Tower" mobile scaffolding with casters.It can be adjusted to a height of 3m to 5m, and can be moved left and right according to the position of the demolition work.
- The typical size of the work floor is around 90 x 180 cm.
- Before using, make sure the ground level and brake lock is checked.
- Working alone is easy to be unstable, so multiple people always work.
*However, there is a risk of falling on windy days, so be sure to use a protective rope or weight in conjunction with it.
Pattern 3: Use a simple scaffold and stepladder in combination (simple reinforcement)
For short, small-scale work (e.g., removal of handrails only), you can also work using a wide stepladder with a stepladder or a folding scaffolding platform (workbench).However, this is for "temporary and light work only."
- Only on days when there is no wind
- The assistant supports the stepladder
- Do not use it for beams or work at high altitudes (hazardous if you lean your body out)
Safe Work Order and Points to Be aware of
When dismantling the balcony on the second floor, sudden removal of the flooring or handrails can cause the frame to become unbalanced and cause it to fall.The following procedure will improve safety.
- Work area maintenance: A blue tarp is placed on the ground to prevent damage caused by falling objects.If you have plants or an air conditioner outdoor unit, please move it in advance.
- Scaffolding installation and confirmation: At least two people will install the scaffolding, checking horizontal and vertical positions and shaking.
- Removal of handrails and fences: Remove the handrails and fences with an impact screwdriver.If necessary, cut and slowly lower.
- Removing flooring: Carefully remove the balcony floor one by one.Corroded areas are easily collapsed, so you cannot put your feet on them.
- Dismantling frames and pillars: Loosen beams and girder materials.Before applying any force, check "where it is connected to other parts" before proceeding.
- Parts are transported to the ground: Always hang long or heavy parts with ropes or share them with two or more people and take them out.
- Substrate inspection: Inspect the walls and eaves after demolishing and repair if necessary.
Tips for DIY scaffolding
- "Two people can always work at high altitudes": One person cannot call for help when the scaffolding is shaking or when the work is incorrect.
- "Be sure to check the weather before work": Cancelled on strong rain and windy days.Wet iron pipes are very slippery.
- "To avoid dropping tools in the waist bag": Inadvertently dropping impacts, crowbars, etc. can lead to serious accidents.
- "Make sure to protect yourself": Protect your glass, fences, vehicles, etc. to prevent damage.
*When using scaffolding, please take into consideration the installation space and surrounding environment.
When dismantling the second floor balcony, understanding the structure and materials, while ensuring the safety of the work platform is the key to success.In particular, "building a solid footing by providing ample space for work" is not only easy to dismantle, but also directly affecting the prevention of accidents.
"Ensuring a good footing first" will affect the efficiency, safety and quality of the overall work.A slight feeling like "I'll do it while I'm there" or "I'll be able to do it with a stepladder" could lead to a major accident, so even if it costs money, ensure your footing is the number one priority.
STEP 3: Repair and reinforcement of the base and structure
3-1. Check for corrosion and termite damage
After removal, the exterior walls and eaves will be exposed.Here, carefully check for "wooden corrosion" and "termite damage."If you find any abnormalities such as a rag, holed or softened wood, thoroughly remove the damaged area and replace it with new wood.
3-2. Use of appropriate repair materials
Repairing wooden houses uses structural plywood and embalmed square timber.If necessary, reinforce hardware (reinforced hardware, brace hardware, hold-down hardware, etc.) to check for any problems with the structure.Water-resistant treatment is performed using sealing material to prevent water from entering.
3-3. Inspection of foundations and foundations
If the balcony support is in contact with the ground, be sure to check the joints with the foundation and foundation.In the case of Japanese wooden houses, it is possible that the foundation corrodes in places where moisture is likely to accumulate.Consider also protecting it with "preservative + moisture-proof sheet" and creating a gradient that won't accumulate.
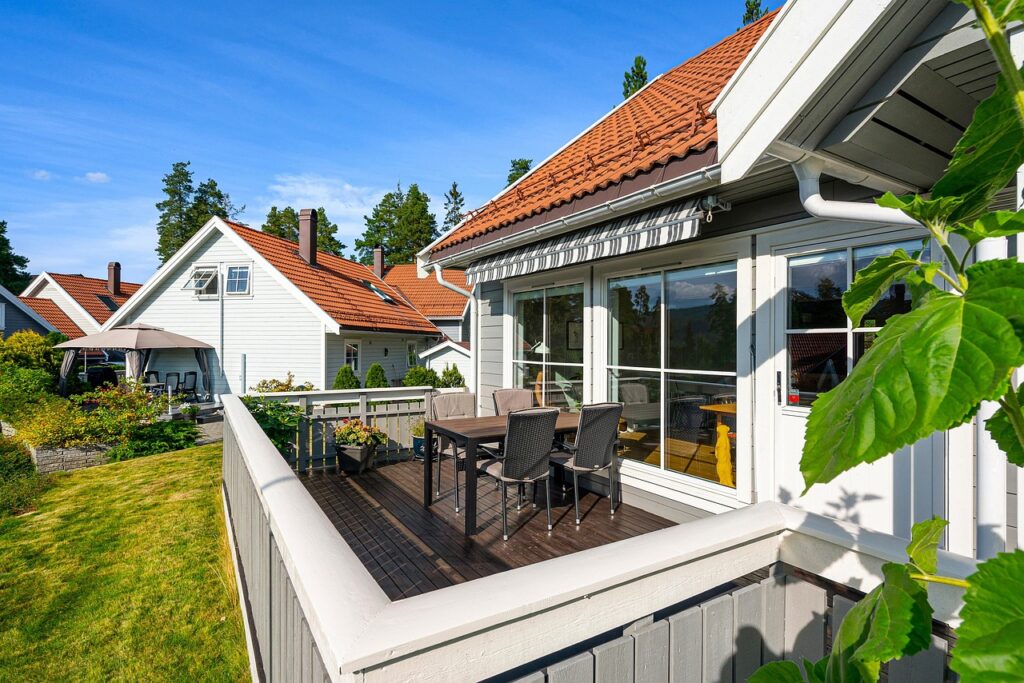
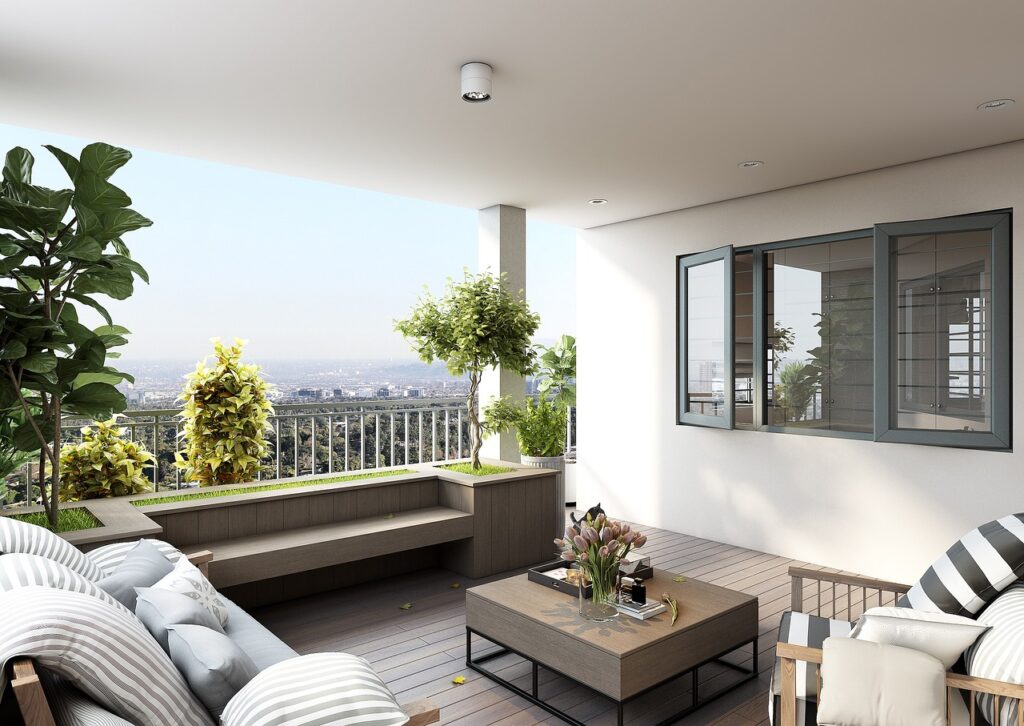
STEP 4: Selection and design of new veranda and balconies
4-1. Consider your purpose, budget and design
There are "various construction methods and designs for each purpose" on the veranda and balcony.Are you just hanging out the laundry, enjoying gardening, or wanting enough space for a family to have a barbecue?This will change the required width and load capacity.
4-2. Selection of material
Typical materials are as follows:
- "Wooden": Natural atmosphere and easy to DIY.However, preservation and waterproofing are essential.Regular maintenance is required.
- "Made of steel": High strength and high degree of freedom in shape.Rust prevention is important.
- "Made of aluminum": Lightweight and rust resistant.There are a wide variety of ready-made kits, making installation relatively easy.
- "FRP (fiber reinforced plastic)": resistant to water and corrosion and highly waterproof.One-piece molded flooring materials are available commercially.
For DIYers, aluminum kits and wood deck types are popular considering ease of installation and ease of maintenance.
4-3. Also refer to overseas construction methods
Overseas, deck systems using "composite materials (composite materials made of resin and wood flour)" are also popular.The number of products available in Japan is increasing, and it is characterized by its resistance to corrosion while maintaining the texture of the wood.The price is a bit high, but the advantage is that it has a long life and low maintenance.
4-4. Design loads and sizes
As mentioned above, the estimated load is 180-200kg/m².The larger the balcony, the more people and the amount of things you expect, so please refer to the following as a simple method for structural calculations.
- Determine the expected weight based on floor area x 200kg/m²
- Calculate the strength of columns, beams, foundations, etc. for the expected weight (for DIY, consult an expert or use the product manufacturer's manual)
Under the Building Standards Act, if you add a balcony, it may be considered a structural expansion and renovation.It's safe to incorporate expert opinions as much as possible.
4-5. Where to buy
There are many different places to buy,DIY to help remodelorEx Shop,Kohnan (コーナン)I think it's possible to consider it!
STEP 5: Installation method (multiple construction methods and selection criteria)
Here we will list some typical "external balconies" installation methods and explain the selection criteria and points to be careful about.
5-1. Construction Method A: Wall-mounted type (wall-mounted type)
This type supports the floor surface by fixing a bracket (support bracket) to the exterior wall.No pillars are required, so it does not take up any space on the ground.
- "Benefits": It looks neat, saves space, and makes effective use of the space below.
- "Disadvantages": The strength of the exterior wall is important.As the load is concentrated on the wall, it is dangerous if not properly reinforced.
- "Step-by-step example"
- Check the location of the pillars and beams of the building (find the position of the pillar using a base sensor, etc.).
- Determine where the support bracket will be attached and securely secure it with anchor bolts.
- Place a floor frame on the metal fittings and apply the flooring material.
- Attach handrails and wall panels to apply waterproof treatment.
5-2. Construction Method B: Column-built type (independent support type)
This is a method in which independent pillars are built on the ground and the top is connected to the wall of the house.
- "Advantages": The pillars support the load, so there is less strain on the building.It's easy to make a large balcony.
- "Disadvantages": Space is required for pillar installation.The foundation work is a bit difficult.
- "Step-by-step example"
- Determine where the pillars are to be set up, excavate the foundation (with a shovel or an electric hammer), and concrete is cast.
- The pillars are fixed (using anchor bolts and turn-down hardware).
- We build a floor assembly by assemble beams and girders.
- Flooring is laid out and waterproofed.
- Handrails and wall panels are installed.
5-3. Construction Method C: Pre-made unit type (aluminum or FRP kit)
This method involves purchasing ready-made units sold by home improvement stores or manufacturers, assembling and installing them.There are often two types of pillar-built and wall-mounted models.
- "Benefits": Installation is relatively easy and includes extensive manuals and support.The quality of the finish is stable.
- "Disadvantages": Size and design are limited.It is difficult to customize the details unless it is a custom product.
- "Step-by-step example"
- Follow the instruction manual included with the kit to check and assemble the parts temporarily.
- The support brackets and pillars are secured in place.Reinforce the base if necessary.
- The main frame is assembled and decking materials and flooring materials are installed.
- The handrail and side panels are installed to perform waterproofing and sealing treatment.
- The bolts and screws were retarded and the operation was confirmed in the end.
5-4. Selection criteria
Which construction method you choose is determined by your budget, size, building structure, construction space, and design.Generally, if you want to keep costs down and have a relatively compact balcony, you can choose a wall-mounted type, if you want to have a large space, or a ready-made unit type, if you want to make installation easier.
STEP 6: Waterproof and finish
6-1. Waterproofing treatment of floor surfaces
Waterproofing on the floor is very important.To prevent leaks and corrosion, choose one of the following methods:
- "FRP waterproofing": A method of hardening by applying a resin containing glass fiber.Highly durable and low maintenance.
- "Urethane Waterproof": Apply liquid urethane resin to harden.Easy to handle complex shapes.
- "PVC sheet waterproof": How to attach a polyvinyl chloride sheet.It is necessary to weld the seams, but the construction period is relatively short.
- "Waterproof Paint": For wood decks, waterproof with paint.Regular repainting is required.
6-2. Handrails and wall sealing
Ceiling is carefully applied to the bases and the walls where rainwater is prone to intrusion.Use sealing materials such as "modified silicone" that are highly water-resistant and weather-resistant for outdoor use.
6-3. Final finish
If you're particular about the appearance, we finish with antiseptic or stain paint for wood, anti-rust paint for steel, and aluminum cleaner for aluminum.If you are considering walking and safety, it is also a good idea to apply anti-slip coating to the flooring.
STEP 7: Safety check
7-1. Inspection of bolts and screws
Once completed, tighten all bolts and screws and check for any wobble.It may loosen up over time, so it's safe to check once every six months.
7-2. Load capacity test
A few families will try riding it and test it out to see if it is safe to use.Of course, if there is a heavy shaking or creak, reinforcement or reinspection is required.
7-3. Waterproof check
On a rainy day, try pouring water on a hose and checking for leaks or puddles.If even a little water appears to be infiltrating, try improving the sealing and drainage.
Other points to note
- "Local government permission": Installation or renovation of balconies may be treated as an extension.Some areas have restrictions under the Building Standards Act and local ordinances, so please check with your local government before construction work.
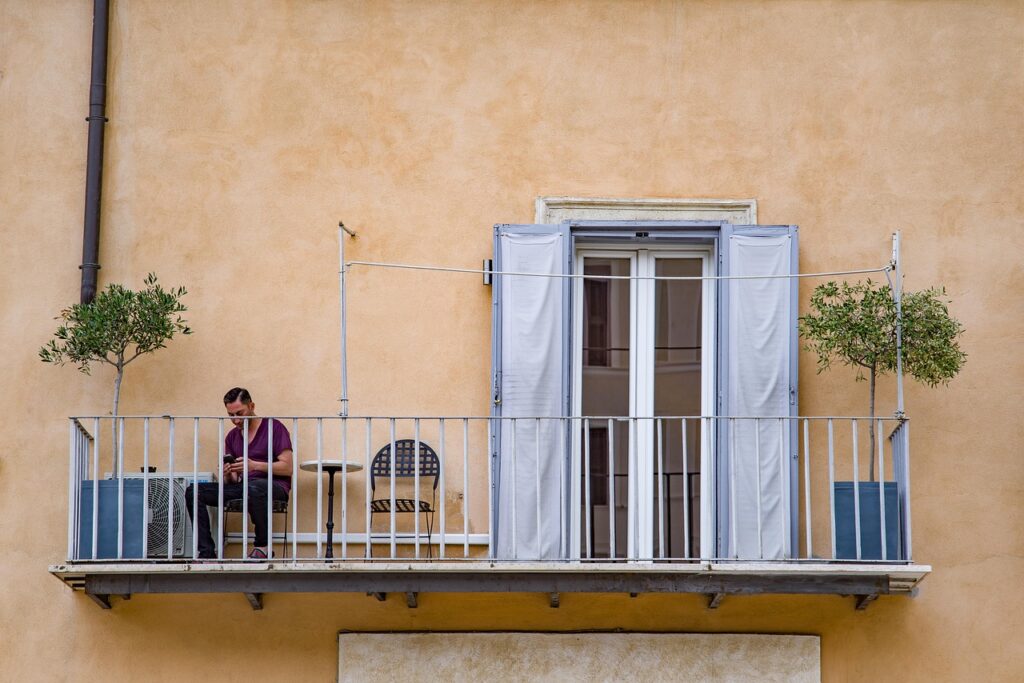
- "Dropping Falling Object Countermeasures": If the balcony or balcony is a place where people and cars pass, consider a height and shape of the handrail that is safe for objects to fall (according to the Building Standards Act, the handrail height is generally 110 cm or more).
- "Use of fire": When having a barbecue on a wooden balcony, fire prevention measures such as laying out a fireproof mat are necessary.
Recommended construction methods and how to choose
Below is a list of the techniques introduced in this article.Compare your goals, budgets, and construction difficulty and choose the method that suits you.
- "Wall-mounted type (wall-mounted type)"
- Advantages: Easy to reserve space at the bottom of the building
- Disadvantages: Strong dependent on the strength of the exterior walls
- Construction difficulty: Medium
- Cost: Medium to high (easy to high if wall reinforcement is required)
- "Port-built type (independent support type)"
- Advantages: Easy to make a large balcony
- Disadvantages: Cost and effort required for pillars and foundation work
- Construction difficulty: Medium to high
- Cost: Medium to high (depending on whether or not concrete foundations are present)
- "Pre-made unit type (aluminum, FRP, etc.)"
- Advantages: A comprehensive construction manual, stable finish
- Disadvantages: Standard products have limited freedom
- Installation difficulty: low to medium
- Cost: Medium (depending on product grade)
- "Wood deck type (DIY)"
- Advantages: Natural texture, relatively easy to process
- Disadvantages: Regular painting and maintenance is required, and corrosion risk
- Installation difficulty: Medium to high (depending on size)
- Cost: Low to high (depending on the material)
- "Composite material type made overseas"
- Advantages: Resistant to rot and low maintenance
- Cons: High price
- Installation difficulty: Medium (depending on product)
- Cost: High (for imported or brand-name products)
Summary: Key points to successful self-renovation
To DIY your retrofit balcony or balcony, you will need to go through a variety of processes, from dismantling to structural reinforcement, waterproofing and finishing.Keeping the following points in mind will help you achieve a safer and more satisfying result.
- "Previous current situation surveys are all basics": Understand the structure of the house and carefully check whether there is corrosion.
- "Safety First": Work at high altitudes so don't forget to wear a helmet and safety equipment.It is also important to ensure scaffolding.
- "Be careful of load capacity and waterproofing": Even in DIY, you will understand the concept of load calculations and carefully perform waterproofing.
- "Comparing and examining multiple construction methods": Choose a construction method that suits your purpose and budget, such as wall-mounted, pillar-built, or ready-made units.
- "Check local government": Check whether building inspections are necessary to prevent illegal expansion.
- "Regular Maintenance": The balcony and balcony are exposed to rain and wind.Perform regular inspections and repairs.
Self-renovation is difficult, but the "sense of accomplishment you can get after completion" is also exceptional.I hope this article will help you make your home even a little more comfortable.Be sure to prioritize safety and try to create your ideal balcony or balcony.
If you're wondering "How much renovation or remodeling can I actually do on my own home?" or "Where should I even start?", please visit this page. If you're looking to learn more about specific renovation processes or construction details, don't miss this page as well!
Well, then!
Leave a Reply
You must be logged in to post a comment.