Introduction
In recent years, we have started to hear the terms "self-renovation" and "DIY renovation."Renovating your home yourself not only reduces costs, but also gives you a sense of accomplishment and a sense of accomplishment in creating the living space you want.However, especiallyWooden houseIn this case, it is quite difficult to perform structure-related tasks by yourself, such as replacing columns, structural reinforcement, and adjusting the level of foundations and beams.
In this article,Japanese wooden houses (up to 2 stories) are expectedWe will then break down the process so that even beginners can understand it, and explain it with an engineering quantitative perspective.After reading this article, you will be able to take the step forward in self-renovation structural reinforcement work, such as replacing pillars and supporting them with a hugging pillar, saying, "Let's give it a go!!"
- Estimated reader
- DIY enthusiasts who want to renovate or renovate an old wooden house
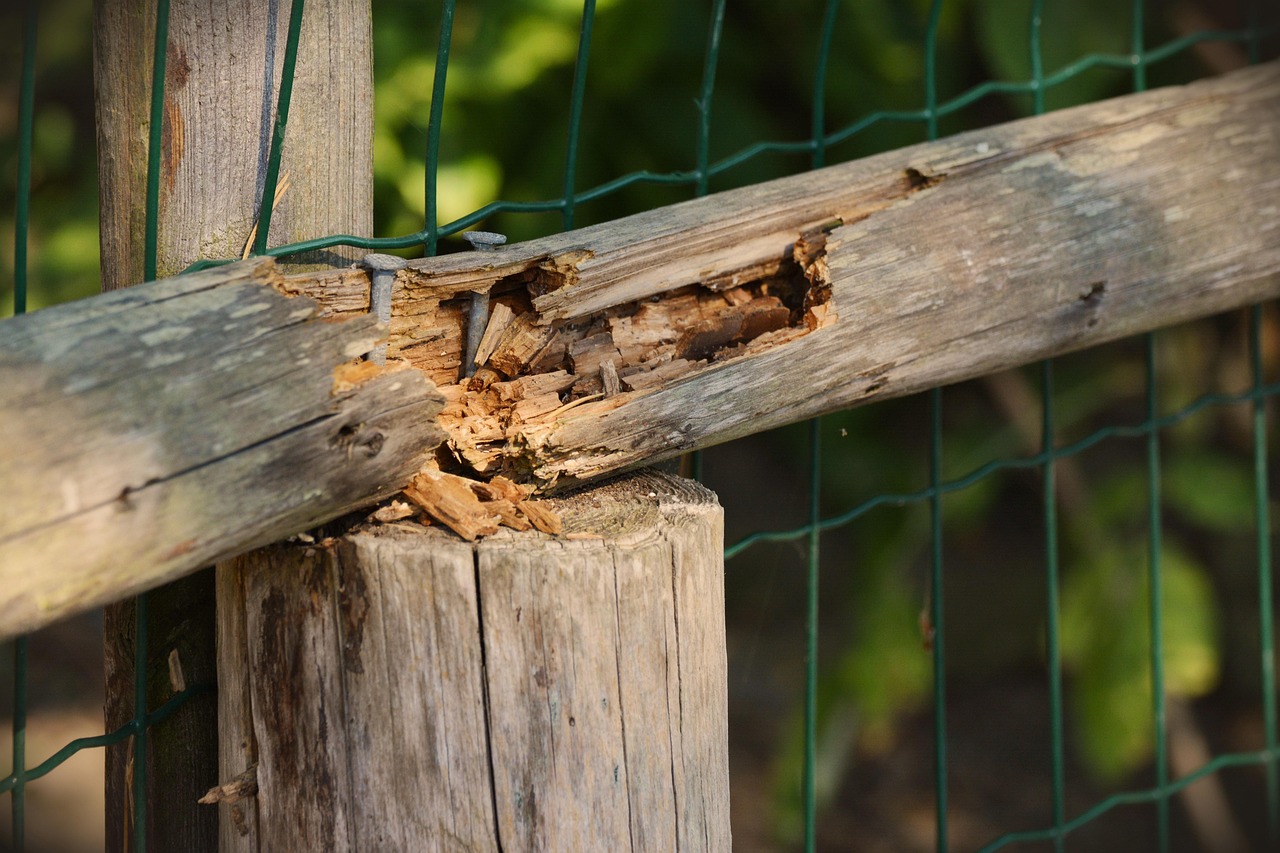
- Those who feel that the pillars of their home are damaged by termite damage or corrosion
- Those who think it's not worth asking a carpenter or craftsman, but are worried about working on their own
- Those who want to know engineering safety standards and how to choose tools
So let's take a look!
Basic knowledge of wooden houses

Difference between a through column and a tube column
In Japanese traditional wooden houses,Through pillarandTube columnThe term often appears.
- Through columns (120mm square is the mainstream)
These pillars run from the base on the first floor to the attic (or shack beams) on the second floor.Due to its structure, it is characterized by its large role in supporting important loads (vertical loads, horizontal forces such as earthquakes and wind). - Pipe column (105mm square is the mainstream)
The pillars are installed on each floor, and are slightly thinner than the through pillars.However, multiple tube columns balance the entire house to distribute the load, and structural stability is achieved through the wall volume and the arrangement of the walls.
This difference in size also leads to differences in ability to support loads.Thicker columns (120mm square) have greater rigidity and provide higher bending and compression strength.
Standard and reasons for pillar size
- 120mm squareThe through pillars have been used in traditional traditional construction methods since ancient times.It combines well with beams and girders, allowing for a structure that can withstand large earthquakes and strong winds.
- 105mm squareAlthough the tube columns are a relatively new standard, they are still considered to be strong enough.Since the load applied to a wooden house is actually distributed and supported by the number of pillars, there are many situations where even a 105mm square is not a problem.
The role of pillars in wooden houses
Columns are essential structural materials for supporting the vertical load (weight from above) of a house, and for stabilizing the entire house along with beams and foundations against horizontal forces (earthquakes, wind, etc.).If the pillar is left damaged, for example, if the pillar is damaged due to termite damage and has a missing section, the risk of collapse increases in the event of an earthquake.In order to live safely and securely, it is important to carefully check the condition of the pillars and replace and reinforce them as necessary.
Basic process of disassembly and pillar replacement
Preparation before dismantling
Before starting to replace or reinforce the pillars through self-renovation,Dismantling the surroundingsis required.Specifically, check the following:
- Removing wall finishing materials
- Remove the underlying material that covers the wall, such as plasterboard or lath board, and expose the structures such as pillars and beams.
- Removing some ceiling boards and floors
- To see the joints with columns and beams.
- Check the location of electrical wiring, gas pipes, and water supply and drainage pipes
- Be careful not to accidentally cut wiring or pipes when dismantling the area near a pillar.Consult with the contractor if necessary.
When dismantling, asbestos and old building materials should be considered.Houses built in the 1970s and early 1990s may contain sprayed asbestos and building materials containing asbestos.If you are going to work on your own, consult with your local government counter or specialist in advance and respond carefully.
The entire process flow
- Demolition and surrounding area check
- Temporary support jack installation
- Removal of damaged pillars (root joints or whole replacement)
- New pillar installation and fixation
- Level adjustment and final conclusion
- Finishing and Completion Inspection
DIY pillar replacement is a task that involves a temporary weakening of the structure.Process control and safety measures are extremely important as columns are replaced while supporting the superstructure (beams and girders) using jacks and support materials.
Necessary tools and materials
- Power tools: Impact driver, circular saw, saber saw (for dismantling), multi-tools, etc.
- Hammer Bar: Essentials for demolition work
- Jacking machine(See below)
- Support material (supports used as pillars): Pipe support, single pipe pipe, wood, etc.
- Major, horizontal, laser level: Essential for high accuracy installation
- Column material: Purchase required sizes such as 105mm square or 120mm square if necessary
- Joint metal: It depends on whether or not there is a hollow or not and the hardware construction method (hagoita bolts, hold-down hardware, etc.) - It is currently mandatory to use hardware on the pillars.The type isThis KaneshinThe page is helpful!
- Protective equipment: helmets, gloves, dust masks, protective glasses, etc.
- Preservatives and termite-resistant agents: necessary to cut off the source that caused the wood to corrode or replace!
Types of support (reinforcement) construction methods
What is the embroidery method?
Pole construction methodThis is a method of reinforcing new pillars by embedding them (overlaid) onto existing pillars.When replacing the entire pillar, the dismantling area will be wider, and the temporary support of the superstructure tends to be large, but if it is a hugging pillarPartially reinforcedYou can increase the strength while doing so.
- merit:
- There is no need to completely remove existing pillars
- Relatively easy to install even when living
- It can also reduce costs
- Disadvantages:
- It is difficult to choose how to fasten the existing pillar (screws, bolts, hardware)
- Because the pillars are doubled, there may be restrictions on the interior dimensions.
Jack-up method foundation
Wooden houseReplacing pillars and repairing the foundationNow, let's look at the superstructureSlightly lifted with a jackThe common method is to create gaps and replace the pillars.For example, when removing damaged pillars, the jacks play a role in supporting the beams and roof from below.
Other reinforcement methods
- Root joint (replacement of the bottom of the column)
Even if you do not replace the entire pillar, if termites and rotting bacteria are concentrated at the bottom, only the lower half of the pillar is replaced and joined with hardware, stoves, or reinforcements. - Reinforcement of foundation and floor assembly
Not just the pillars,The foundation and floor beams are damagedIn some cases, reinforcement and replacement of the product may be the first priority.Even if only the top is fixed, if the foundation is damaged, no structural stability will be achieved.
Selecting a Jack and Safety Measures
The difference between hydraulic jacks and journal jacks
Commonly used in DIYHydraulic jackHowever, from professional pull-ups (professionals who move whole houses),Gear-type journal jackIn some cases, it is recommended.The reasons for this are as follows:
- Hydraulic jack
- The up and down movement is smooth
- Great power to lift heavy objects
- However, due to oil leaks and pressure loss,It gradually decreases over timeIt's possible.
- There are cases where it is weak to lateral loads
- Journal jack (screw jack)
- Turn the screw to move up and down
- There is no oil leakageHolding power is stable
- Some degree of resistance in the lateral direction
- It is slightly heavier than hydraulic and takes longer to work
Conclusion: In general DIY, hydraulic jacks are often used that are easy to find at home improvement stores, but be careful of measures to prevent them from falling over and the risk of oil coming out.Plus, if you get a journal jack, you can expect safer and more reliable work.
For more information,HereIt is summarized in:
Avoiding the risk of falls during jack-up work
- Install the support material (temporary pillar) firmly
- It is very dangerous to support a building just between the jack and the beam, so temporary support should always be assembled nearby.
- Get footing and adjust the level
- To prevent the jack from tilting, place a plate or steel plate with sufficient thickness and strength below the base.
- Don't lift it up very much at once
- When replacing the pillar, lifting is often a few mm to 1 cm.Make sure to move up and down little by little, so that the entire building does not get abruptly shaken up.
Installation of scaffolding, temporary pillars and support materials
Safety firstTo work with the jack itself, you need to use the surrounding area.Temporary supportis important.For example, measures such as hanging single pipes diagonally to prevent buildings from falling over are effective.It looks big butThere is a risk of collapse during workIf you think about it, it can be said that being too strict is just right.
How to view quantitative data engineering

Basics of Load Calculation (Simple Version)
A rough calculation of the general floor area and load for wooden houses is as follows.
- Building weight (approximate):
For wooden houses with a total floor area of 30 tsubo (approximately 100 m2) including the first and second floors, the overall weight of the building is said to be approximately 30 to 40 tons (varies depending on roofing materials, exterior materials, etc.). - Load supported by a single pillar:
Usually, multiple through-posts and tube columns are arranged in a balanced manner on the first floor, and these are used to distribute the load and support them.For example, assuming that there are 10 main pillars on the first floor, a simple calculation could result in a load of around 3 to 4 tons per unit (although it is not actually uniform depending on the amount of walls and floor assembly).
However, this number is only a guideline, as not all pillars are loaded equally.The stress distribution becomes even more complicated when horizontal forces such as earthquakes and wind are applied.
The concept of loads (vertical loads and horizontal forces) applied to pillars
- Vertical load:
Building weight + load capacity of people, furniture, etc.- For wooden houses, the design guideline is approximately 180 to 200 kg per m2 (living floor load under the Building Standards Act).(From the "Minimum Regulations" based on the Building Standards Act Enforcement Ordinance and the Society's Guidelines)
- Horizontal force:
Force applied horizontally by earthquakes, winds, typhoons, etc.- Wooden houses require a structure that transmits this horizontal force through load-bearing walls (brushes and plywood).
When replacing or reinforcing some pillars,Location and amount of surrounding wallsIf you don't plan with the same in mind,Overall earthquake resistancemay drop.
Balance with load-bearing walls and braces
Not only are the pillars being replaced, but the strength of the building depends on the presence or absence of braces (X-shaped diagonals) and structural plywood inside the wall.Especially if you remove a wall to replace the pillar, it is desirable to restore the bearing wall in that area.When renovating DIY, you tend to be captivated by the strength of the pillars, but consider reinforcing the wall's strength as a set.
Pillar replacement procedure (practical)

So, actuallyReplacing damaged pillarsorReinforceLet's take a look at the steps.We will explain the situation based on the assumption that the surrounding area has been demolished before work.
Removing existing posts
- Preparing for jack-up
- Set a jack near the pillar you are replacing and lift the beams and girder slightly to allow the load to escape.
- At the same time, **temporary pillars (support material)** are set up to ensure safety.
- Confirming the joints of columns, beams and foundations
- Check how it is fixed, such as traditional hozo joints and hardware joints.
- Removed nails and hardware around the pillars
- Remove any screws and metal fittings that get in the way to remove the pillar.
- Cut with chainsaws, saber saws, circular saws, etc.
- RootingIn this case, cut only the damaged part and remove it.
- If you want to replace the entire pillarNear the beam and the foundationSeparate at the position.
Points to note: Always make sure the jacks and columns are functioning to prevent the structure from falling apart during cutting.
Installation and fixing of new pillars (root joints and replacement)
- Rooting:
- If you want to replace only the bottom with a new pillar material,Hardware (root joint hardware) and plugsJoin with something like that.
- Carefully adjust the height to prevent the joints from shifting.
- Translate:
- If you are replacing the entire column, you can either carve a hollow on both the beam and the base side, orHardware construction methodConsider whether to fasten it with.
- In the fight with the beamHoorayIf there is aFor DIYOmit the Hozo and use the special hardwareThat's definitely the case.
Temporary level adjustment and final fixation
- Temporary fixation stage
- If you set up a new pillar, check the **vertical state (pass-through)**.Using laser levels and lowered positions will improve accuracy.
- At this stage, temporarily fasten it with screws or clamps.
- Check the level
- If the floor or beam is tilted very closely,Distortion of not only pillars but also foundations and beamsneed to be adjusted comprehensively.
- Final fixation
- If there are no problems, fasten the hook firmly with the hardware.The beam side and base side are firmly fixed,Required load resistance wallWe will proceed to the finishing touches such as restoring the product.
How to reinforce with a cradling pole
- Layer new pillars on existing pillars
- The side to be huggedSmoothly processingto increase the adhesion.
- Connected with bolts and screws
- GenerallyAll screw bolts about M12Use multiple slits to tighten the pillars together.
- If you use screws alone, you may be weak to axial force, so make use of bolts and hardware.
- Fixing the bottom and top edges
- The mounting hardware was selected to ensure that both the foundation and beams, the existing and new pillars are connected together.
The embrace pillar construction methodWithout major demolitionThis can improve the strength of the poles, but if the existing pillars are significantly corroded, in many cases it is more likely to be safer by replacing them.
Construction points and points to note
Level adjustments are not made using only pillars
In actual homes, the foundations may be subsided or the beams may be bent.Forced lengths of the pillars can be fixed to the structure in a distorted state.
- point:
- First, check the level of the base, pull, beams, girder, etc.If possible, prioritize balancing the entire structure, such as jacking up the foundation and re-leveling.
- If the cause is a significant downsink in the home, foundation repairs and ground improvements may be necessary.
How to deal with distortions in the foundation and beams
- Consult with an expert if necessary
- As carpenters and tow-home professionals do, lifting and modifying the entire foundation is very difficult by DIY alone.
- Compare with budget and time
- If you do extensive work to completely correct the overall level, you can incur costs beyond the scope of DIY.
Confirmation of Building Standards Act and Local Government Ordinances
In some cases, pillar replacement and load-bearing wall repairsStructural changesIt may be considered.If it is a major renovation,A confirmation application with the government office and a design by an architect is requiredPlease be aware that there are cases where this occurs.Especially if you are planning to expand or renovate the building with a two-story building, be sure to consult with your local government.
Mindset and limits for self-renovation
How much can you do DIY?
- Demolition work, undercover treatment, and surface finishing are relatively easy to tackle even in the DIY area.
- Replacing and repairing structural components such as columns and beams is a high hurdle in terms of safety and construction laws, so it is necessary to study and prepare thoroughly before performing this.
Cases to consider requesting a professional
- If there is subsidence or cracks in the foundation
- If you need to replace a large beam or girder
- When it is necessary to reinforce the roof or horizontal structure surfaces of the upper floors (such as a shed) at the same time
- If you are considering applying local government subsidies for a building that requires earthquake resistance diagnosis and reinforcement design
Tips for preventing accidents
- Always work with multiple people: You cannot sense the danger alone.
- There's no hurry: Don't panic during construction periods, and ensure each process is completed.
- Get expert advice if necessary: Not only will it utilize DIY know-how, but it also uses the knowledge of carpenters and architects.
Summary

Key points of this article
- Pillar basic knowledge
- The through columns are 120mm square and the tube columns are 105mm square.The thicker the structure is advantageous, but overall balance is important.
- Basic process of pillar replacement and reinforcement
- From disassembly to jacking up, replacing pillars, fixing and finishing.
- The importance of jacks and temporary support
- Understand the characteristics of hydraulic jacks and journal jacks, and take thorough measures to prevent them from falling over.
- Load calculation from an engineering perspective
- Understand the building weight and the estimated loads supported by the pillars, so that you do not disrupt the structural balance.
- Limitations of DIY renovation
- It is safe to ask a specialist for large sinking and complex structural reinforcements.
References, recommended videos, and related sites
- Carpentry Manual [Carpentry Manual]
- 134. Replacing pillars and foundations during renovations [Carpentry explanation] Procedures and points to note
- You can see specific footage of jack-ups and root joints.
- Example video of a hugging pole construction method
- Pole construction method(ひとりでできるマンDIYさん)
- Earthquake resistance diagnosis and renovation guide for wooden houses(Ministry of Land, Infrastructure, Transport and Tourism)
- You can obtain technical guidelines for earthquake-resistant reinforcement and information on subsidies.
- Catalogs from various hardware manufacturers
- Get a catalogue containing hardware for pillar joints, root joints, and embracing poles to make the work smoother.
Conclusion
Self-renovation is more difficult to replace pillars and support, as it involves stepping into the structural parts, compared to replacing wallpaper and floors.However, by using this article as a reference to understand the process, necessary tools, safety measures, and guidelines for engineering load calculations, even beginners can take the initiative with the attitude of "Let's try it first."
Of course, the structure of a house is an important factor in protecting human life and assets.If you have any major repairs or concerns, you can rest assured that you will receive the support of professionals such as architects, carpenters, and tow houses.Also, some local governments often have subsidies for renovating wooden houses or seismic reinforcement, so please try gathering information.
We hope this article will help you to further enhance your self-renovation life and help you create a safe and comfortable home.Please try it while enjoying the sense of accomplishment and attachment that only DIY can achieve.
If you're wondering "How much renovation or remodeling can I actually do on my own home?" or "Where should I even start?", please visit this page. If you're looking to learn more about specific renovation processes or construction details, don't miss this page as well!


Leave a Reply
You must be logged in to post a comment.