Hello everyone, this is "DIY Renova."
"I'm about to repaint the exterior walls, but scaffolding is required for high-altitude work. But it's expensive if I ask a contractor, so I wonder if I can't get a footing on my own?"
Do you have any such concerns?
In this article, for those who want to use scaffolding in DIY,
- What parts do you need?
- Notes on calculation and design
- How to order even amateurs won't fail
We have carefully compiled the following.
Safety is the top priority for scaffolding work, so correct knowledge and preparation are very important.
By reading this article, you will be able to prepare with confidence, saying, "Even amateurs can choose the right footing!" We will explain the terminology as much as possible, so please feel free to read with confidence.
What is DIY scaffolding? Differences from professionals and range of use
Hello everyone, this is DIY Renova.
I want to rent a scaffolding, but I'm an amateur so I don't know what to do and what to be careful about...
Is there anyone like that?
This time, I've put together a summary of this problem in order to answer that problem. I hope this is helpful.
First of all, many people may wonder, "Is it okay to install scaffolding DIY?"
To put it simply, there are very few legal restrictions as long as it is "a place where you can use it yourself during your home renovation work." However, careful design and construction is essential as it is necessary to have a third party use it or if an accident occurs during a high-level work.
Under Japan's Occupational Safety and Health Act, it is mandatory that work at a height of 2m or more must be "installed with scaffolding etc." in professional sites, and the use of a statutory "scaffold inspector" qualification or a "Temporary Industry Association certified product" is required. However, DIY is not so strict as long as it is the premise that you will use it yourself on your own property.
However, safety should not be ignored.
Because it's a "focus to protect your own life," you need to be careful as a professional.
So, here you go.
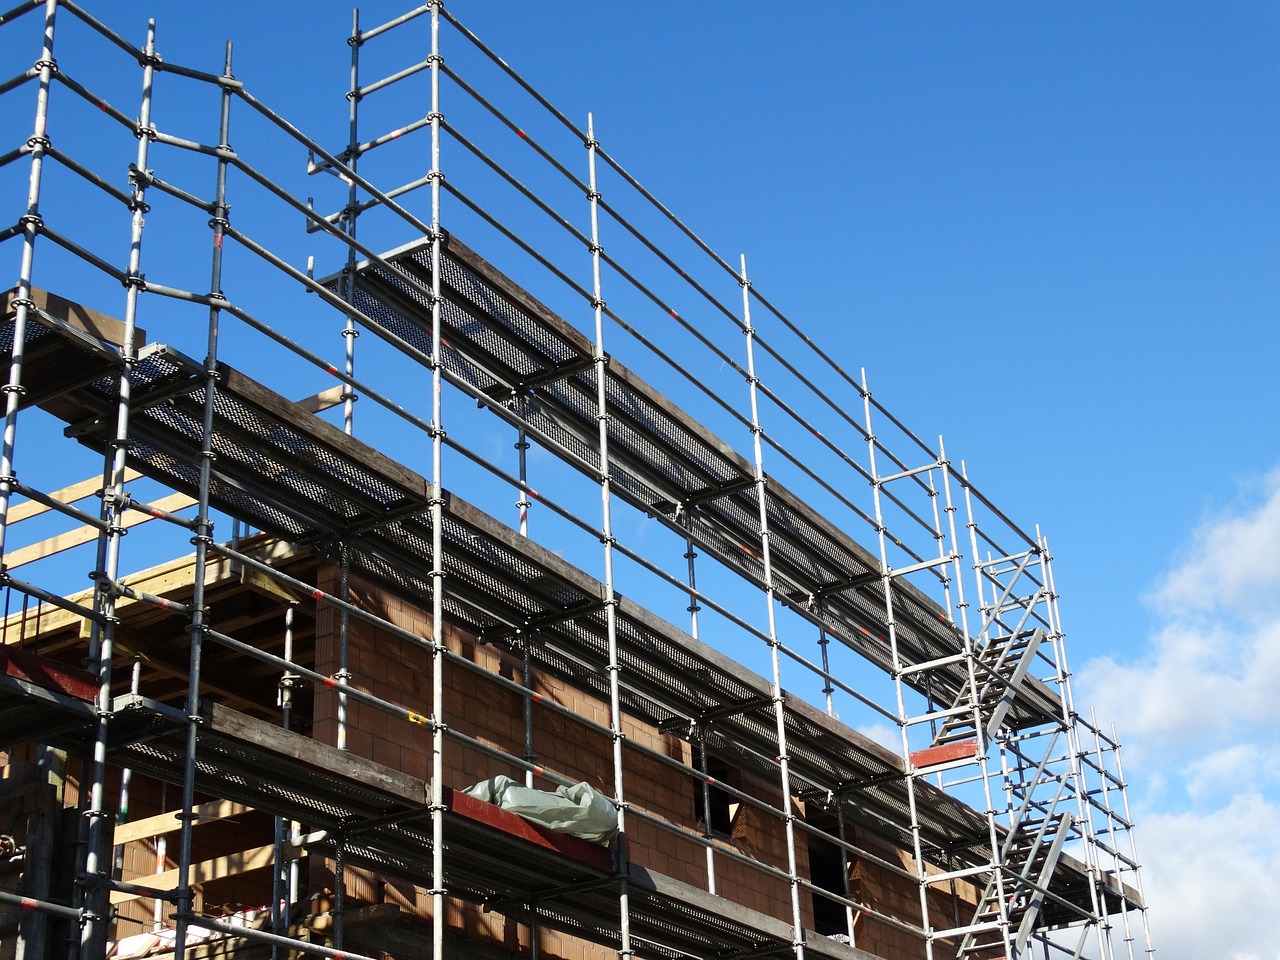
Basic structure of scaffolding
First, check the list of the necessary components for scaffolding.
1. Support (vertical pipe)
These are parts that become "posts" for scaffolding, and are installed at regular intervals to support the entire structure. Basically, steel pipes (single pipes) in increments of 180cm to 210cm are used.
Recently, there are also lightweight aluminum products, but considering wind pressure and load capacity, iron (steel) is a safe option.
2. Jack Base
This is an adjustment device that can be placed under the support and keeps it vertical to the ground. This jack will fine-tune it, especially if the ground is not flat.
[POINT] It is convenient to have a "free jack (adjustable angle)" on slopes or slopes.
You can find it on Amazon and other sites by searching for "single tube jack base."
3. Jack board (pad board)
Board to be laid under the jack baseThis is a very important component for stabilizing the scaffold.
By using this,Risk of tilt and falling due to sinking into the ground, unevenness (unevenness)can greatly reduce the number of
Legally important! Provisions in the Occupational Safety and Health Regulations
According to Article 564 of Japan's Occupational Safety and Health Regulations (Supporting ground for scaffolding),
"Under the scaffolding posts, a sufficiently strong lith, and other appropriate measures must be taken to prevent subsidence."
It is clearly stated.
In other words,"Not laying a board could be a violation of the law"That's what it means. Even when it comes to DIY, if you ask a third party to do the work or install it in a residential area, it is essential to take measures in line with the purpose of the law, both in terms of safety and prevention of problems.
Cases that are particularly recommended for use
- Soft ground such as gardens, gravel, lawns, soil
- Muddy sites are prone to rainy weather and wetlands
- Places that require heavy weight, such as two stories or more
How to choose a board
| kinds | Features | recommendation |
|---|---|---|
| Plywood | Inexpensive and easy to process, but limited durability | Suitable for short-term DIY |
| Plastic board | Lightweight, highly durable, reusable | Ideal for long-term use and reuse |
[Size guide]
30cm x 30cm or more, thickness approximately 15-24mm
It ensures that the support poles can rest firmly on, preventing wobbling and twisting.
Things to note when using a board
- Always place the jack base in the center of the board
- If there are unevenness,Sharp the ground with bricks or crushed stonesInstalling the board
- In places with poor drainage,Ideals such as thick planks or stacking twoof
The boards are unsung heroes who are "simple but protect life." These are parts that are often overlooked, but if safety is your number one priority, you should never leave them out.
4. Braces
This is an oblique reinforcement material that is attached diagonally to prevent the scaffold from wobbling. The higher the higher the importance of this brace.
Especially when building up the scaffolding up to the second floor, it is basic to have at least one set on each floor.
5. Stepping board (scaffolding board)
This is the floor where workers actually ride. There are aluminum, steel and wooden products, but "aluminum" is the most recommended option for safety, anti-slip properties and durability. It's expensive, so if you're financially unable to do it, but you're confident in your muscles, choose steel. Also, the weight is easy to get, so I wonder where to get it.
The standard size is about 40cm wide x 180cm long.
6. Bracket (protruding support)
This is an instrument used to support treads in tight spaces, and is installed in a way that protrudes from the wall. The one with triangular reinforcement brackets is excellent in stability.
Scaffolding design checkpoints
In small areas, use one support pole and bracket to make it slimmer
At corners of a house or areas where the neighboring house is approaching, you may not be able to make room for two posts. In that case, it is a good idea to switch to "Supporting it with just one support using a bracket."
However, there is a risk of instability, so be careful about the number of braces and the angle of installation.
The taller the more braces there are
Scaffolding for high-altitude work, such as houses with two or more stories or areas near the tip of a sloped roof, is particularly prone to unstable.
Therefore, installing the product with one set of braces on the first floor and two sets on the second floor will greatly increase the stability.
(Engineering is that it is important to have a placement that allows the moment (rotational force) to be distributed in order to increase the rigidity of a structure.)
Be careful of ground slope: Use jack angle adjustment
Especially in older Japanese houses, the area around the house may be sloping. To set up scaffolding on such lands, use a "flix jack" that can absorb tilt.
How to apply a flame retardant net and its importance
One of the things that can be surprisingly forgotten about when it comes to DIY scaffolding is the installation of a "flame-retardant net."
The flame-retardant net (mesh sheet) that surrounds the scaffolding has the following functions:
- Preventing falling of tools and materials during work
- Prevents dust and paint from surrounding area
- Reducing the risk of spreading fire in case of an emergency
Although this is not legally required, be sure to install it if a nearby home is in contact with it or if you are painting or roofing on a second floor or above. It also prevents accidents and problems.
It's basically to stick vertically
The flame-retardant net is stretched like a tarp between the poles. Basically, you should stick it vertically, and hang a roll-type net from above and secure it with a cable ties.
[POINT]
If there is a gap of more than 10cm between the net and the post, it can be extremely dangerous to be blown away by the wind. Be sure to make sure you stick it perfectly.
Start designing and calculating scaffolds by "drawing on paper."
There's no need to think about it very hard when writing blueprints. On A4 paper, roughly draw an elevation view of the house (side view) and write down the position of the posts, the number of steps on the treads, and the location of the struts, and the location of the strands.
for example:
- The spacing between the poles is basically 180cm to 200cm
- The treads are on the first floor: around 180cm from the ground, and the 2nd floor: 180cm more on top of it
- At least one strand for each step (2 strands, X-shape if possible)
[POINT] It is recommended to use the "Metric Module." For example, "outer wall with a width of 5.4m = 3 pillars (180cm intervals)."
Also, if you are unsure about the structure, you can use the scaffolding rental company's design service (free or inexpensive).
Design and calculations for scaffolding are improved by "drawing on paper" and "digital modeling"!
When you design your own scaffolding, you may feel that it would be difficult...The most important thing is to "visualize" your image.
You can start by drawing on paper. On A4 paper, roughly sketch the elevation (side view) of the house and draw the following:
- Position of the poles (basically 180cm intervals)
- Number of steps on the tread (1st step = 180cm, 2nd step = 360cm, etc.)
- Straight (placed in X or V shapes)
This alone is enough preparation,If possible, it would be ideal to use 2D or 3D design software..
Using the model can prevent accidents such as "clashing" or "not reaching" in advance
Why are 3D models effective?
- The distance between me and the neighboring house was too small to install the treadboard.
- The roof was steeper than I expected and the footing was not high enough.
- The treads were unable to be installed due to interference with windows and eaves.
With DIY scaffolding, there are often the following "failures that you notice after installation":
These issues areBy simulating using a three-dimensional model, you can understand it in advanceThat's it.
Possibility of 3D scaffolding design using Rhino (Rhinoceras)
Rhino is a 3D modeling software widely used in the fields of architecture, design and product modeling, and is also very suitable for DIY applications.
Why Rhino is suitable for DIY scaffolding designs
| Features | Contents |
|---|---|
| Precision dimension input | Accurately reproduces the height, width and slope of the scaffold |
| Lightweight data structure | Easy to work on older PCs |
| Plugin extension | You can easily create repeatable structures using Grasshopper etc. |
| PDF and drawing output | Easily share design data with contractors and acquaintances |
For example, if you use Rhino, you can use "set the scaffold 30cm away from the exterior wall" or "install the treads diagonally to match the roof slope on the second floor."Visualization based on actual sizecan.
Other free/low-cost tools that can be used at DIY levels
Rhino charges apply,There are educational and trial versions, and are highly recommended for those who want to seriously try out precise DIY designs..
👉 Rhino Official Website (English)
| Tool name | Features | correspondence |
|---|---|---|
| SketchUp Free | A free 3D tool that can be used in your browser. Intuitive operation | For beginners |
| Sweet Home 3D | Easy to model your homes such as floor plans and furniture | Compatible with both 2D and 3D |
| Floorplanner | 2D-centered but convenient for drawing | Perfect for planning stages |
| FreeCAD | Open source 3D design software. High degree of freedom | For intermediate to advanced users |
You can also "automatically calculate the necessary parts" from the model
A further advanced way to use Rhino + Grasshopper (visual programming) to include the number of pillars and the number of treads.Automatic calculation toolIt is also possible to make it.
- Automatic scaffolding is generated based on 3D models of the house
- Automatically counts the quantity of each part
- Bulk output from floor plan, elevation and perspective (diagonal view)
Once you've done this much, you're now at the same level as a professional temporary design.
Even if it's DIY, you can do this much as long as you have the time and motivation to learn.
Consider the "track size" you plan to use
The scaffolding parts are surprisingly "bulk" and "heavy." For example, even just 10 support posts can exceed 30kg. Please be especially careful of the following points:
- When carrying on a light truck: Aligned parts up to 180cm long (it is dangerous to be over 2m in total length) especially the support! Professional scaffolding shops transport items over 3m, but a 1.5-ton truck is not usually needed, so order half the size.
- When renting a 2-ton truck: Make sure you have enough space to park and carry it in.
- If the road in front of your home is narrow: Consult with delivery service and consider hand transportation.
【example】
・Even if I bought a 3m aluminum treadboard, it wouldn't fit in a light truck → In the end, I had no choice but to join with a short treadboard.
- The load weight is fine, but it was bulky so I couldn't put it on the truck on the first floor.
Below is a summary of the articles on transport.
Things to note when dealing with money or contracting
Even if it's DIY, if you have an acquaintance or friend help you and pay the daily allowance or material costs as a thank you, this can be a "contractor."
In such cases, you may be considered "working accident" or "not covered by insurance," so you should be aware of the following points.
- Before you work, make sure you know how far you'll need to help.
- Check in advance whether your insurance (home insurance, fire insurance, etc.) includes DIY construction accidents
- Work is always carried out during the day with a safety belt or something similar.
"If you're careful, it's okay" is a dangerous idea.
If you have your contracted, there is a possibility that you will be involved in a worker's accident, so you may have to take into consideration the Industrial Safety Act. take care!
Recommended purchase list for DIY scaffolding users
Here we'll list items that are useful to have at least aligned for those who want to build a DIY footing.
| Item | Recommended points |
|---|---|
| Jack base | We recommend a flexible type that can be used for slopes |
| Fireproof net | Essential for preventing scattering and falling |
| Aluminum tread | Lightweight, anti-slip and durable |
| Binding band | Convenient for fixing nets and temporary fastening |
| Gloves and work gloves | Anti-slip for increased safety |
Where should I rent it? Recommended scaffolding rental companies
This video introduces scaffolding rental companies (information as of 2025, if you contacted us about this but found that it didn't work, please feel free to update it, so please feel free to update it.feedbackPlease let us know! ).
Conclusion: Scaffolding is the "lifeline" for DIY construction
This time, we have explained everything from the basics to the applications for installing scaffolds in DIY.
To sum up:
- Scaffolding design is planned by drawing on paper
- The most important thing is how to choose parts and ensure safety.
- It is necessary to judge based on local conditions such as terrain and delivery methods.
- Don't forget to use flame retardant nets and swaying
- If you ask someone else, do not neglect to check the law and insurance.
If the scaffolding is strong, various DIY tasks such as exterior wall painting, roof repairs, and gutter replacement can be carried out safely and efficiently.
"Selecting tools," "Advance planning," "Investing in safety."
Keep these three things in mind and live a safe and secure DIY life!
References
Based on this information, we have provided safe and practical content.
For more articles on scaffolding, please seeHerePlease try looking from.
If you're wondering "How much renovation or remodeling can I actually do on my own home?" or "Where should I even start?", please visit this page. If you're looking to learn more about specific renovation processes or construction details, don't miss this page as well!
Leave a Reply
You must be logged in to post a comment.